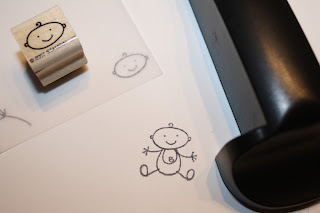
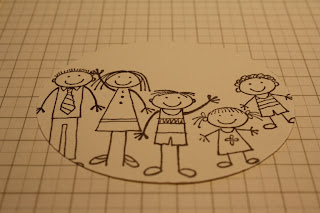
Today I was playing with the 'All in the Family' stamp set - lots of different heads and bodies to put together however you like. Of course, it is possible to line them up 'freehand', but to be really sure the heads were going to attach to the bodies, I decided to use my stamp-a-ma-jig.
Many of you probably have a stamp-a-ma-jig, and know how to use it, but for those of you who may not, here is a little rundown.
The stamp-a-ma-jig consists of a clear imaging sheet (plastic square), and a black handle. The first thing I should point out is that for this exercise, I am not using the imaging sheet provided. Because most times I use this set, I end up also using the stamp-a-ma-jig, I finally got around to doing something that someone in my SU team once recommended (sorry, cannot remember who - anyone keen to take the credit for this great idea?) I went ahead and made some permanent imaging sheets. I cut a sheet of vellum into squares (7 x 7cm) and in each corner stamped a different stamp, using the stamp-a-ma-jig. That will save time in the future!

So anyway, how to use the stamp-a-ma-jig...
1. I started by stamping the 'baby body' onto my card (I didn't use the stamp-a-ma-jig for that bit).

2. Line the corner of the imaging sheet up with the base of the handle. Stamp the baby head onto the corner of the imaging sheet - making sure to keep the edge of the wooden stamp block up against the corners of the handle.

3. Lay the imaging sheet over the stamped card, and position so that the head attaches to the body.

4. Reposition the handle so that it once again lines up with the corner of the imaging sheet - making sure not to move either the card, or the imaging sheet. ( I should point out here, I am left handed, so often have the handle to the right of the action, and at the bottom of the imaging sheet. It will work with the handle to the right or left, and you can also turn it around so it is at the top of the imaging sheet if you prefer!)

4. When you are happy with the positioning, carefully remove the imaging sheet, taking care not to move the handle, or card.

5. Reink the stamp, and carefully line the edges of the wooden block up with the edges of the handle. Stamp the image.

6. Ta daa! Your stamp is positioned PERFECTLY!

Especially handy when you want to stamp out the whole family.....

and of course, any other time you want to make sure you stamp in just the right spot!
If you feel nervous about stamping straight on to your project (such as a nearly completed scrapbook layout - eek!) then this could be the tool for you.
(this may be the last 'stamp-a-ma-jig' post for a while - what a pain to have to keep writing 'stamp-a-ma-jig' over and over!)


That's a great tip about the vellum. I am going to do this for my lettering stamps - should only need 7 sheets for a whole alphabet!
ReplyDeleteoh yep - think I may need to do some more stamp sets too - the hardest bit is getting around to it!
ReplyDelete