Pages

Saturday, July 25, 2009

Random bits and pieces...

Today I got to do something I haven't done in a while. I went to a papercraft class. Five blissful hours out of the house doing crafty stuff. It was the first time I had done a class for months - and best of all, because I wasn't the teacher, I didn't have to do the prep! I got to make a really cute little stationery set, using some lovely papers. I need to take some photos and then I will share some more of that!

Add to that I have a lovely new book to read...

Clean and Simple Scrapbooking - The Sequel, by Cathy Zielske

I am trying to make it 'last' as long as possible, and so far have just looked at the pictures. I do know that when looking at a book about scrapbooking, the pictures are pretty much where it is at, but still, I am just looking, not actually studying them yet. Much. Except a couple of pages where I couldn't resist a read. Glad I did too, as Cathy made an excellent point that I thought I would share. I'm not sure about you, but I take a LOT of photos. I don't scrapbook at the same rate. The to do pile grows much faster than the done pile (those are all my points!)

Cathy suggested a photo album. Not a scrapbook album. Not a 'temporary storage until I scrapbook them' photo album, but instead an actual, old style photo album, with maybe a note or two about what is going on, and then leave it at that. Because it is nice to get the photos out of the box (or off the computer) and where people can see them, and because not everything needs to be scrapbooked.

Good Point Cathy. I think I am going to buy a nice photo album (or two). Amazing how that the pressure lifts when you remember that you don't have to scrapbook it all! Cathy Zielske - putting the fun back in scrapbooking! Go check out her blog if you don't already.

In other news, the launch of the Spring Mini Catalogue is fast approaching, and there are a few things in there that I am especially excited about, but that's all I'm going to say for the moment! I will be sending out copies to my stamp club members. If anyone else would like one please contact me and I will add you to the mailing list. I will also add a link on my sidebar to the online version, just as soon as it becomes available (1 August).

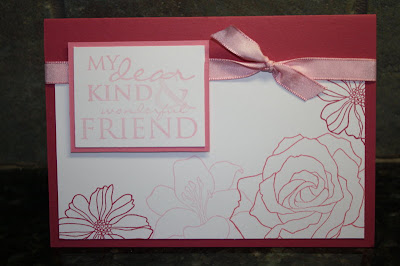
In other, other news, I was so happy this week to discover that this card had been chosen as one of the lucky top 20 in Kristina's colour challenge round up! Wow - that was a buzz. Thanks to all those lovely people who visited to check out the card, and especially those who left lovely comments. There are a lot of incredibly talented people who participate in these challenges so I sure do feel special this week! I've said it before and I will say it again - challenges are fun, and, well, challenging. If you haven't already you should try it!
Finally, I suspect that my posts may be few and far between the next couple of weeks as we are having guests and will be out exploring again. I had planned to be super organised and do lots of projects this week, so I would have a wee stockpile of blog stuff all set and ready to go, but I got a new book instead. You can probably figure out the rest!

Wednesday, July 22, 2009

A sweet vanilla sundae - or something like that!

OK - so actually it is a Sweet 'Sunday' challenge, and the flavour is vanilla and saffron - but man - this card has been making me think about French Vanilla ice cream all afternoon, and that was before I made the Sunday /Sundae connection (I have a headache - my brain is in slow mo!)
Before I head to bed to sleep it off, I had better forget the ice cream and get on to the card. First up the inspiration...

A great little sketch challenge that I have been meaning to give a try for a little while now. Bridie had an unplanned afternoon sleep today, and instead of joining her which would have been the sensible thing to do, I decided to do some creating - the other sensible thing. So here it is:


A saffron and vanilla creation - I think it is such a yummy colour combo. I also really like the way my fake lace doily (that would be an eyelet border punched and then crimped vanilla card strip) worked out.


Stamps from the nursery Necessities set, and background paper from the 'Tea Party' pack.

This was actually the second card I made. The first one ended up being a little too upside down and back to front compared to the original sketch. How many changes can you make before it nolonger qualifies for the challenge I wonder? I think I crossed the line with the first one, so I will have to share it another day!

Saturday, July 18, 2009

from a quick card to a quick layout...

After making this quick card for the latest Kristina Werner Colour Challenge I got to thinking that it might also work well as a scrapbook project. I ummed and ahhed a bit over what size to make it - 12 x 12 or an A4 / 8.5 x 11 hybrid? The hybrid size won out because I had been wanting to do another of these for a while.


It was pretty much the same as the card, except this time I used rub on letters for the title, rather than stamps. I decided it didn't need any journaling, the title says it all, but then got to thinking - one day down the track would we want to know how old those crazy kids were when they did those silly things? What's so crazy about eating a carrot or wearing goggles anyway? I was going to make notes on the back of the layout - just in case, but decided instead to go with some 'hidden journaling' on a tag behind the photos. This meant attaching the photos to another piece of card, rather than straight onto the base card, to make a space for the tag.

I am really loving this colour combo (ballet blue, certainly celery, pumpkin pie, so saffron, riding hood red, and white). It has a really happy feel about it. The coloured hearts and white writing really pop off the ballet blue background. I think this might be my new favourite blue!

Oh, just in case you were thinking I had six children and where do I find the time for scrapbooking?! I actually have three children (two photos of each) and where the heck can I find some time to scrapbook?!

Thursday, July 16, 2009

A quick colour challenge card

Time for another colour challenge from Kristina Werner. Pretty colours this week, although at first glance, all those colours were a little intimidating!

Time was short today, so just a quick card using the 'heart to heart' punch. It's like three punches in one, so a good time saver. Punch out a collection of hearts, add a dash of white pen around the outside of the card, and a greeting from the 'short and sweet' set and this is what you get...

Might have to have another try later on. I have an idea, and if you see a post about it, it worked out!

Wednesday, July 15, 2009

Inspiration from the SU Idea Book and Catalogue

After a few days holiday, and then a few days catching up (sleep, laundry, emails, more laundry!) it was time for a creativity fix. I made a deal with my kiddos - let Mummy play now, and we can all play together later. They agreed, but since their sense of time and mine are not always in sync, I didn't want to be mucking around too much - time could be short!

Cue the Idea Book and Catalogue...

I think I have already mentioned that 'Fifth Avenue Floral' is one of my favourites, and the samples in the book are one of the reasons. So elegant, and so pretty every time. I had been planning on making a card like this one (on page 82) for a while, and today was the day. Here is my take on it...

It is a little different from the catalogue sample, but not by much. Instead of a circle behind the 'hi' I decided to use the large oval punch. I used the jumbo outline alphabet to stamp the 'hi' on choc chip card, and then carefully cut it out (rather than cover chipboard letters as in the catalogue sample). The ribbon colour is also different - choc chip instead of white (there's a reason it was brought out of retirement by SU!)

One of the reasons I liked going to the Idea Book for inspiration was that the project came together really quickly. The design part was all there for me, ready to copy or tweek as desired.

It is also a really good starting point for other projects. It is so easy to swap out materials to fit what you have in your stash, or change colours or greetings to suit - like in this next card I made.

You can also change the orientation of the card, or play with the positioning of the different elements, like this last sample.

This time I went back to the 'hi', but substituted a punched border for the ribbon of the original. I also added a bit of sponging around the edges of the oval and stamped flower section, just to change the look a little.

And then, just as I was on a roll, my time was up. Darn it! Will have to file those ideas away for next time.

In the past the idea book and catalogue included a list of all the 'ingredients' at the back for each project shown throughout the book. This year they have been left out, but a full list (with photos) is available on the Stampin' Up Website - click here to go straight to it (or use the link on my sidebar). Don't forget too, that even when the catalogues are retired - the ideas book part of it doesn't have to be. Happy creating!

Sunday, July 12, 2009

Scrapbooking with Kids - Bridie's Turn

As soon as Bridie (who turned three last month) saw that the boy's had their own scrapbooks to make, she of course wanted one of her own. I had pretty much figured that would be the case, but knowing that her one is more likely to have - shall we say - 'additional journalling and embellishments' added with time, courtesy of Miss Bridie, I was keen to make it a quick and simple little book. That way, it would be easier for me to let her do her thing with it, and actually enjoy it, rather than me hovering over her ready to say the words 'put that pen/scissors/sticky tape down now!'

Bridie wanted to help make the book too. So that was another reason for quick and simple! To start off I let her choose a patterned paper (from the 'retired pile' - stuff like that isn't important to kids!) and then we gathered some card to match. I trimmed the pages so that each was slightly longer than the previous one, and then to add a girly twist we punched out one side using the eyelet border punch. We then scored each page about 2cm from the opposite 'spine edge' just to make it easier to open the book when it was done. Lastly we punched holes along the 'spine' and used jumbo eyelets to hold it all together. That was the base of the book done.


Here is a quick look at the back of the book too. By attaching more jumbo eyelets at the back, inside of the first ones, you can make the back of your book look just as neat as the front.


When it came time to decide what to put in the book we encountered a few problems. Asking Bridie 'what do you want to scrapbook?' resulted in answers like 'my scrapbook'. Asking her 'which photos she would like to stick in there?' was also a little broad. So I ended up making an executive decision, and suggested we should make the book about our visit to Disneyland a few months back. She thought that was a good idea (whew!). From there it was much easier for her to choose her favourite photos from a much smaller selection, and we printed them out 'wallet size' here at home. I did the cutting out, and then we sorted them into piles - princesses in one pile, minnie's house in another etc. Together we stuck them all on. Bridie especially enjoyed putting the double sided tape on the back of the photos.


We attached all the photos at once, just so we don't lose any of them. Writing 'the story' though, is a process I am hoping we will be able to stretch out for a few days. That is a really interesting process in itself. Bridie chose which page she wanted to write about, and which colour pen to use, and then she tells me what to write.

Although I am sure that I would have written how much fun it was to visit Minnie Mouse, and how much Bridie loved exploring her house, I had definitely forgotten that Bridie had pretended to eat Minnie's food, and hadn't realised that it had made such an impression on her. Another reason why I am really enjoying these projects with my kids.

Thursday, July 9, 2009

Holiday Scrapbook Kits for my Boys

This is a project that I am feeling really excited about. In an attempt to better document my children's perspectives of the adventures they are having I decided to have the boys scrapbook those adventures themselves! Hayden is 9 so should be able to manage this fine, Campbell is 5 - he will be dictating any journaling and I will write it for him.

Other than that, I am hoping I will be able to let them do their thing. Hoping. I may find myself jumping in with a suggestion here and there, and obviously the basis of it all was my doing, but still, better than all done by me, right?
So here is the holiday scrapbook box. It includes albums, spare pages, embellishments, and any bits and pieces they gather along the way, that are waiting to be included in their scrapbooks.


I made two mini albums (8 x 8 inches - not so big that it is intimidating, but big enough to fit those treasures I am sure they will accumulate!) The colours came straight from a Kristina Werner Challenge a few weeks back - nice and summery (oh yes, we get to enjoy two summers this year!) and perfect for boys. Apart from a couple of little differences on the front, so we can tell them apart, the albums are the same. I decided to stick with the same colours for both, so that the box of goodies could just be divided between them without, hopefully, any arguments.


To get them started I have made a few pages of various sizes and colours. A few are already in the albums (to give it an actual album feel - it was amazing how excited they were to see those few blank pages waiting for them in THEIR albums!) The rest are waiting in the box. I have also included a few envelopes and memo cards (some decorated with a strip of patterned paper, some not). I wasn't sure how into it they would be when I first was putting it all together, so tried to keep it nice and simple (I figured I could always recycle those pages for something else!) The boys know too, that if they need something else - different size or colour etc, we can make it to suit.
Also in the box, a selection of embellishments - punched shapes, stamped images and journaling squares, strips of patterned paper for borders, and card for titles. Once again, this is just a starting point. We can add any other embellishments as we go along.

So how is it going? Better than I had hoped! Both boys are really excited about this project. I was a little worried that it might feel a bit too much like holiday homework (not the intention, but, just quietly, an added bonus of a project like this!) but so far that hasn't been the case. They are excited to choose photos, and put the pages together. We have had a few fun activities happening over the past couple of weeks, so there is a bit of catch up to do. Letting them choose what they want to document, when, is part of the fun for them. Interesting for me too. I was sure that Campbell would want to start with his T Ball classes - he has really been enjoying them, and so looks forward to Mondays at the moment. But no. The thing he most wanted to document .... when Daddy hid Jaffas (yummy NZ candy for those North American readers!) in the popcorn when we had a movie night last week. Here it is...


Confession time. That isn't the actual popcorn. We didn't take a photo at the time. Campbell suggested we could maybe make some more and take a photo of that. Ulterior motives perhaps? Maybe. Stunt popcorn tastes delicious! As for those jaffas - I might have suggested that we could maybe use this circle punch to make some.... but Campbell picked the red card, did the punching, cut one in half and requested that I please write 'chomp' next to that one. Such a fun thing to do together!

And check out this proud boy showing Daddy his first scrapbook page...


This project just gets better and better! (did I mention Miss Bridie yet? Oh yep - she wants in on the action too - tune in next time for Bridie's Mini Album!)

Wednesday, July 8, 2009

Aiming to scrapbook from a different perspective

A couple of weeks ago I had a reminder that my children see the world differently from me, a lot of the time. That isn't a new thing. Most mornings I ask Bridie what she wants for breakfast, and she replies, with total outrage in her voice, she doesn't want breakfast, she wants FOOD!! Just to clarify, most times, when Bridie wants FOOD, she actually means potato chips. And there I was thinking breakfast was food too! (For the record - she doesn't get potato chips!) Different perspectives - it's kind of hard to miss.
When it comes to documenting their adventures and achievements though, I am guilty of forgetting about that. Most times I am documenting what I think is important, the way that I saw it, and hoping that they like the final product. They do (whew), but they are liking the way Mummy documented her perspective of their activity. This month I am aiming to include a lot more of their own perspective in my projects, their projects, our projects.

So how to go about doing that? I have a few ideas, and a couple of projects that we have started on. I want this mixture of perspectives to be the beginning of an ongoing change, so I am thinking these ideas and projects need to be easy things, or they might not happen.

  • Maybe the easiest thing to do will be handing the camera over. This is not a new thing - we have done it before, but actually using those photos for a project is the next crucial step. Juggling one camera between three children will also prove interesting (and may even be worthy of a scrapbook layout of its own!) We are about the head off for a few days holiday, so we shall see how that goes...

  • Getting their input into my layouts - especially those layouts about things we have experienced together. That is not difficult, right? Finding out what did they like? What did they not like? What was their favourite bit? We all went to a symphony orchestra concert at an incredible outdoor venue at the weekend. On the way home we asked them for one word to describe the evening. Bridie said 'the music was AMAZING'. Hayden wanted to go with amazing too, but changed it to EXCITING. Campbell summed it all up with 'WOO HOOO!' Are those not great words for a layout?

  • There is a park nearby that we go to often. It has occurred to me that we all love it there, and all for different reasons. Bridie loves the playground. Campbell loves that he plays T Ball there. Hayden loves looking for bugs, and wildlife. Peter was amazed to see a wild deer roaming around. And I am loving taking photos of all the beautiful wild flowers and plants. Next time we go I am planning on taking photos of every one's favourite bits and putting it together on a layout. Watch this space!!

  • Perhaps the thing I am most excited about, are the 'holiday scrapbook kits' I have made up for the boys. Of course then Bridie wanted one too. Mini albums for them to scrapbook themselves, with a little help as required. So far so good - the kids are as excited as I am. Campbell has 'scheduled a meeting' for tomorrow morning. When I am reading the newspaper, he has asked that I please come into his room so we can have a talk about his scrapbook. Bridie wants to write some more of her 'story' tomorrow please, and Hayden has requested we print out some photos tomorrow so he can get stuck in. Did I mention we are supposed to be going on holiday tomorrow kids? LOVING the enthusiasm!

So that is the plan so far. Does any one have any other good ideas for scrapbooking with children? Any suggestions would be most welcome.

Oh, and sorry about all the words (and no pictures) this post. I promise, we have photos coming - especially now there are FOUR scrapbookers in the house!

Tuesday, July 7, 2009

Floating Water Colour 'Q and A'

Some explanation about these flowers from the last post, which were coloured using a 'floating water colour' technique...

What paper did I use?

All the lovely samples I had seen in my blog travels had used SU 'Shimmery White' paper, which, alas, is not yet available in NZ/Aust. So, I decided to go with water colour paper instead. I am really happy with how it turned out, especially as this was my first (and only, so far) attempt at this technique. I might try glossy white card next. Anyone tried that already?

Did I use Water or Aqua painters?

Both! After you have heat embossed your image spray it with water until the water is pooling inside each of the embossed sections. This is a very 'wet' technique, which is why I decided to go with the water colour paper rather than ordinary card. I then used my aquapainter to 'pick up' ink (drops from a reinker) and deposit it in the appropriate part of the embossed image. The ink should spread thoughout each section by itself. If you want a bit more colour variation you can add more than one colour to each section, and laying the card on an angle to dry will result in a gradient of colour too. Be aware, your project will take a little while to dry.

Sunday, July 5, 2009

Tango on Fifth Avenue

Tangerine Tango that is! This is a colour that I really like but hadn't had much of a chance to play with so far. That said, the card used is tango - the ink colours used for this cool floating watercolour technique were actually really rust and pumpkin pie - I didn't have a tango ink refill.

I think Fifth Avenue Floral may be my favourite stamp set from this catalogue - it was top of the wish list anyway, and is just perfect for this technique. I actually made the flowers a few weeks back - as soon as I got my hands on the stamps, but have only now gotten around to doing something with them. There was a little bit of dazzling diamond glitter in with the embossing powder but I think the hint of sparkle just adds to the magic of this look.

I teamed the Tangerine Tango up with Old Olive, using the now retired 'French Script' background stamp (current equivalent is 'En Francais') to stamp on vanilla card, with some sponging around the edges. Oval punches were used for leaves and the sentiment (from the 'Occasional Greetings' set). Old Olive ribbon and brads finished the card off nicely.

Yep. I am pretty sure that This is my most favourite stamp set - for today anyway!

Thursday, July 2, 2009

Teachers Gift PS

I have just spent the afternoon working on a scrapbooking project for the boys. Not quite ready for sharing, but shouldn't be far off. In the meantime, I decided to take a break and check to see if we had any post today (the old fashioned snail mail variety).
Perfect timing after yesterdays blog post. There was a card for Hayden - from his lovely classroom teacher, thanking him for his gift. She said she loves it, and will be saving the cards for extra special people like her 'Mom'. Hayden had the biggest smile on his face when he read that - and the word 'YEAH !' passed his lips.
Two happy people from one project (before the cards are even sent out). Now that makes me smile!

Wednesday, July 1, 2009

Gifts for Hayden's Teachers

Yesterday's post reminded me that I had not yet shared the gifts we had made for Hayden's teachers a few weeks back. So here they are. There was of course a last minute rush, and I forgot to take photos until after some of the gifts had been packaged, so forgive the photos. I am sure you will get the idea though.

For Hayden's classroom teacher we decided to stick with another of those lovely card folders that we had made for Campbell's teachers (see this post). I thought about making it to match the gifts we had made her earlier in the year, but since I finally had my hands on those beautiful Haiku patterned papers, and the pocket silhouettes stamp set - I couldn't resist going with those instead.
Here is the front of the card folder (inside there is a selection of cards and envelopes - all ready for the lucky recipient to send out).


For the other teachers (PE, Art, Music) and not forgetting the bus driver, we made cute little post it note holders for the ladies (this one in Raspberry Tart papers). Alas, packaged in cellophane bags already, the photo doesn't really show a lot!

For the men we went with bags of decorated chocolates. Hayden thought they might prefer that to the 'kind of girly looking' post it holders! I did suggest we could do them with a pattern that was less floral, but he had already decided on chocolates (I suspect not realising that he wouldn't be eating any of them!)

The gifts were all well received, and I hope they prove useful. Except the chocolates, they are just plain yummy!