Pages

Showing posts with label step-by-step. Show all posts

Thursday, April 30, 2009

Stamp-a-ma-jig 101

Today I was playing with the 'All in the Family' stamp set - lots of different heads and bodies to put together however you like. Of course, it is possible to line them up 'freehand', but to be really sure the heads were going to attach to the bodies, I decided to use my stamp-a-ma-jig.


Many of you probably have a stamp-a-ma-jig, and know how to use it, but for those of you who may not, here is a little rundown.


The stamp-a-ma-jig consists of a clear imaging sheet (plastic square), and a black handle. The first thing I should point out is that for this exercise, I am not using the imaging sheet provided. Because most times I use this set, I end up also using the stamp-a-ma-jig, I finally got around to doing something that someone in my SU team once recommended (sorry, cannot remember who - anyone keen to take the credit for this great idea?) I went ahead and made some permanent imaging sheets. I cut a sheet of vellum into squares (7 x 7cm) and in each corner stamped a different stamp, using the stamp-a-ma-jig. That will save time in the future!


So anyway, how to use the stamp-a-ma-jig...
1. I started by stamping the 'baby body' onto my card (I didn't use the stamp-a-ma-jig for that bit).


2. Line the corner of the imaging sheet up with the base of the handle. Stamp the baby head onto the corner of the imaging sheet - making sure to keep the edge of the wooden stamp block up against the corners of the handle.


3. Lay the imaging sheet over the stamped card, and position so that the head attaches to the body.


4. Reposition the handle so that it once again lines up with the corner of the imaging sheet - making sure not to move either the card, or the imaging sheet. ( I should point out here, I am left handed, so often have the handle to the right of the action, and at the bottom of the imaging sheet. It will work with the handle to the right or left, and you can also turn it around so it is at the top of the imaging sheet if you prefer!)


4. When you are happy with the positioning, carefully remove the imaging sheet, taking care not to move the handle, or card.


5. Reink the stamp, and carefully line the edges of the wooden block up with the edges of the handle. Stamp the image.


6. Ta daa! Your stamp is positioned PERFECTLY!
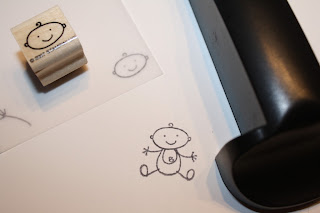


Especially handy when you want to stamp out the whole family.....
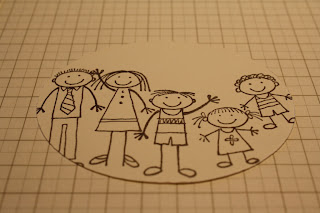
and of course, any other time you want to make sure you stamp in just the right spot!
If you feel nervous about stamping straight on to your project (such as a nearly completed scrapbook layout - eek!) then this could be the tool for you.
(this may be the last 'stamp-a-ma-jig' post for a while - what a pain to have to keep writing 'stamp-a-ma-jig' over and over!)

Tuesday, March 17, 2009

How to Colour Fabric Flowers

As promised, this is how I colour white fabric flowers to match perfectly the colours of my project. You can use the same method to colour ribbon too. Best of all, it is very quick and easy!

What you need:


  • plastic bag (I use a snaplock one, I think because that is what I had the first time I did this - but thinking about it, it probably isn't crucial to have the snappy lock bit! That said, a small clear bag is preferable to the supermarket bag variety).
  • fabric flowers (or ribbon) - these ones are from the Pretties Kit
  • a spray bottle with water (although I couldn't find mine this time so put a couple of drips of water in instead and it worked just fine)
  • ink pad

Step One:


I turn the plastic bag inside out, put my hand inside, and then pat the bag on the inkpad, transferring ink to the bag. Keep in mind that depending on the colour of the ink, you may or may not be able to see the ink on the bag - hold it over a piece of white paper and this may help.


Step Two:
turn the plastic bag back in the right way and give it a couple of quick little sprays of water (or, as mentioned above, if you haven't got a spray bottle for water, I added a couple of drops off the end of my finger, and this seemed to work fine). You don't want a lot of moisture in the bag - just a bit to help the ink transfer evenly. When you have done this add the flower, and wriggle it all around in there. You don't have to put your hands in the bag to do this, just hold the flower through the plastic - I think I forgot to mention that not only is this quick and easy, but also clean!


To start off the colour may appear patchy, but just keep going until it evens out.

Step Three:

Remove the flower and set aside on a piece of paper, or a paper towel to dry off. Because we have only added a tiny amount of water, the flower shouldn't actually be that wet, so should only take a minute or two to dry off enough to use. If you are impatient like me, you could aways try drying it carefully with a heat gun for a couple of seconds. If the colour isn't as intense as you want you may need to repeat the process above.

The flowers in these photos are a pale pink that you won't be recognising

- fresh from an SU box - introducing...

Pink Pirouette - one of the new incolors that are headed our way!

It is so preeettty! Although I don't think it will seen within a mile of a boys project,

It is going to be just perfect for Bridie Isabelle. Luckily there are a couple of other new colours that will go well for the boys, so they won't feel left out at all.

Now my next challenge is to use these flowers on a project to share with you all

(you will notice I am not putting a timeframe on achieving that one!!)