If you have thought about becoming a Stampin' Up! Demonstrator in the past, now is a good time to think about it again. For the month of May, SU are offering a 'scrapbooking starter kit' for just $175 (valued over $220). A sample of a kit is shown below (of course you are welcome to exchange colours, and the stampset for another that you prefer) and includes:
Any stamp set valued up to $91.95 (schoolbook serif alphabet pictured)
A Simply Scrappin pack (petal party pictured)
A 12 x 12 Textured Card Stock Pack (bold brights pictured, but should have been earth elements I think!)
A classic Stampin' Pad (Pumpkin Pie pictured)
Craft and Rubber Scissors.
 In addition you will receive all the business supplies you need to get your business up and running:
The Getting Started DVD and Guide, and a project sample sheet.
100 x Guest Invitation Postcards
8 x Idea Book And Catalogues
10 x 'To my Hostess' envelopes
20 x Hostess Brochures
10 x hostess benefit forms
50 x customer order forms
20 x recruit brochures
This streamlined starter kit is particularly good for people who have already purchased SU product, and don't necessarily need everything the standard kit includes, or those who would like to build their supplies a little more slowly. Of course, throughout the month the standard kit will still be available for the usual price of $379 - click here to see what that includes.
So, a couple of questions...
What are the benefits of becoming a demonstrator?
As a demonstrator you will enjoy many benefits, including discounted purchases for yourself, and the opportunity to earn free product. You also have the opportunity to turn this into a business if you want, and make money from SU. Then of course, there is the wonderful opportunity to meet others with similar interests, and a good excuse to get creating - this could be just the kick in the pants you need! One of the things I found was I nolonger felt guilty for spending time scrapping - it was my job after all!
Do I have to take workshops and/or classes?
Only if you want to. I consider there to be three main types of demonstrator.
Discount Demonstrators - those who join primarily for the discount, buying for themselves, and perhaps selling to a few friends and family.
Hobby demonstrators (this is where I see myself) - doing occasional classes or workshops, but only when it fits in with life (!), and having my hobby pay for itself.
and Business demonstrators - those people who see it as a part time/full time job, and who are creating hugely successful businesses (money in the bank).
What support will I receive as a demonstrator?
As a demonstrator you will receive access to the demonstrator part of the SU website (a great source of ideas and inspiration), as well as a monthly 'magazine' sent out by SU. You also will have the opportunity to attend optional training days put on by SU, and of course the annual convention (next year in Sydney?). You also become a member of a fantastically talented, and supportive team of demonstrators (many of whom have just recieved top honours at convention), having the opportunity to participate in team swaps, trainings, events, and an online forum, for advice, guidance (and just chatting!)
What's the fine print?
click here to see a copy of the demonstrator agreement.
More questions? Please contact me and I am happy to answer any questions you may have. I can definitely recommend becoming a demonstrator. I know I love SU product - and so do a LOT of other people! As an added bonus, because I love my punches so much, if you sign up as a demonstrator with me this month (either with this limited time $175 scrapbooking starter kit, or the standard $379 starter kit) I will throw in the punch of your choice from the current catalogue.
SO, let me know if you have questions, or are interested, please contact me - tracee.creates@gmail.com or traceeandpete@xtra.co.nz I look forward to welcoming you onto the team!


 The neat thing about this project is that it can be changed in so many ways - change the colours and flowers, throw in a butterfly, or other bugs, go for an all green pot plant, or other favourites such as cactus or bonsai.... It could also been a fun way to have some hidden journalling on a scrapbook page, don't you think?


 From Hayden, there was a card - complete with a pop up heart (I think I might have to try that some time!) and a fridge magnet he had made himself. Now that in itself is lovely, but what made it extra special?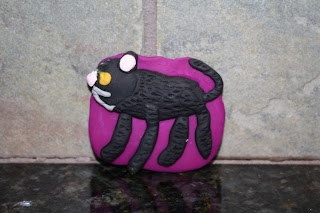


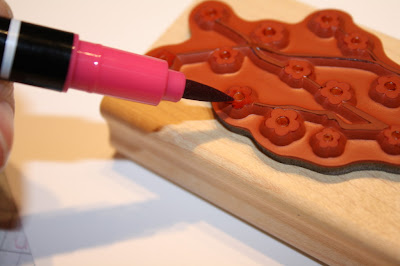
 A 'thank you' from the short and sweet stamp set, and some earth elements brads (mustard) and it was time for Bridie to wake up. And homework to be done. And dinner to prepare.....


 So, in a celebration of scrapbooking, Stampin' Up! have a couple of fantastic promotions for the month of May. First up, free papers. When you purchase three packs of selected Designer Series papers (19.95 + pp) you will get one more pack for free. There is no limit on how many free packs you can get - so if you bought six packs you would get two free....

