Pages

Sunday, May 24, 2009

Expecting guests...

We are expecting guests - in fact, if all has gone according to plan, the plane has just landed. Excitment is high in our house! We had to go to the supermarket earlier to pick up a few things, and came home with these beautiful roses to greet our guests with.


And of course we couldn't pass up the opportunity for a few other little welcoming goodies (these are our first guests afterall!) One of the things we really noticed when we first arrived here was how dry the air was. It is DRRRRY! So we put together some little packages of moisturiser, lip balm, a water bottle, and some tissues etc. I did think about the old chocolate on the pillow routine, but, to be honest, a chocolate left on a pillow in this house, would not last long. Definitely not long enough for the guests to enjoy it that is for sure! So what to do? Something childproof was needed, so I decided to whip up a couple of 'sourcream containers' to make sure the yummies would be safe!


They are super duper easy. I just used a spare scrap of paper - didn't cut it to any particular size (but maybe could have made it a little smaller). All you need to do is roll it into a tube and attach the edges.


Tape together one end. Fill with goodies, then tape together the other end - making sure to squeeze the tube in the opposite direction to before, to make a triangle shaped package (should have taken a photo of that bit - sorry!)


To finish it off, you can use a crimper to add a few crimps to each end of the package, where it has been taped. And there you have it - a childproof package for yummy goodness.
Actually, technically it is probably not childproof. But it should slow them down for a minute or two, and at least this way you will know for SURE if they have pinched anything out of it!


We put all the goodies into paper sacks that we found at the supermarket, crimped, to make it a little more exciting, and used paperclips to hold them shut (which, handily enough, can double as bookmarks). I hope they like them!
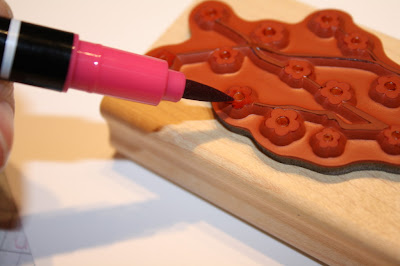
So now the plan is to have kids dinner and dishes done before our guests arrive, so I had better get on. It is likely that I may be a bit quiet here over the next couple of weeks, I am sure you will understand! Of course, it is also possible that I will be busy creating lots of fun stuff with some new goodies that will be arriving with the guests (yay!) I have plans for roses, stamped ones. Just in case it's a while between posts though, here are some real roses, to keep you going!


Saturday, May 23, 2009

Gifts for Campbell's Teachers

We have had a crazy few days here - with the usual goings on, end of school activities for Campbell's school, and a bit of exploring too. Craft time this week has been taken up with a little gift for the two lovely teachers from Campbell's class. After much umming and ahhing I decided to go with a little folder of cards each - inspired by one seen on Mykeesha Byl's blog. Not forgetting, a matching pen...


As mentioned in the previous post I decided to stick with the very lovely, and retired, ginger blossom papers and matching (retired) in colours - groovy guava and river rock, with a bit of vanilla and rub red thrown in.


The front of the folder was decorated with a piece of the patterned paper, layers of cardstock, and some punched out, layered flowers. I love how, with different combinations of colours and positioning of the punchies, you can get so many different looking flowers. Some of the petals, punched from river rock, were cut off, folded in half, and then attached with a stampin dimensional to give a bit more of a leaf look. That middle flower was also popped up on dimensionals.


I kept the inside of the folder unadorned. I decided that when it is filled up with all the cards it is busy enough. The ribbon works, not only as a closure for the folder, but also to keep the cards and envelopes in place, inside the folder.


The teachers really seemed to like their gifts, and were suitably impressed that we had gone to the trouble to make them ourselves. It really does go to show how a simple hand made gift is better than a bought one (almost) every time!

Tuesday, May 19, 2009

The card that inspired the shells card...

Over the past few days I have been working on some little gifts for Campbell's teachers. This is his last week of preschool (for the second time in his life!) Although all the families pitched in and got both teachers something from the children, when you have a stash of craft stuff, it is hard to pass up the opportunity to make a little something too.
I think I have already mentioned the fact that the NZ summer mini catalogue was all but missed by me - something about renovations and relocations, that just don't allow for a whole lot of craft time! Apologies in advance - the next couple of posts will be featuring product that came and went with that mini, and the coordinating, and now retired, in colours. The Ginger Blossom papers worked so well for the gifts for Hayden's teachers, that I had to pull them out again.

Here is one of the cards I made. It was the layout inspiration for the Shells card in the previous post. A little bit of 'rock and roll' and stamping off, to mix up the colours on the stamps, punch them out, and that is about it.

As mentioned, the colours are retired river rock, and groovy guava, with a bit of vanilla and ruby red thrown in. Apart from the greeting, all the stamps are from the also retired 'Live your Dream' set. That set includes the quote 'Go Confidently in the Direction of Your Dreams - Henry David Thoreau'. What could be more perfect than that for someone who's job it is to help shape our children?

Monday, May 18, 2009

Missing the Beach...

We had a warm day here today - high 20s celcius - and when I saw the colours for Kristina's latest colour inspiration - it really did make me think of the beach. A walk along the beach would have been nice today (but it helps that our apartment complex has a pool!)


So anyway, here is what I came up with. I made a card with this kind of layout at the weekend. I really liked the finished look, and it came together so easily (making use of those ever handy punches!) so I decided to try it out again today...

The card colours I used for this challenge were baja breeze, more mustard, so saffron, sahara sand, and of course, white. These colours do have a lovely fresh feel - and I think this would be good for a masculine card.


The ink was all baja breeze. Sea shell stamps from the 'seaside' stamp set, and the greeting from the 'A little Birthday Cheer' set - using that one a lot lately!

Sunday, May 17, 2009

Pots of Fun....

Not to mention, flowers! This is a fun flower pot card, that I have been seeing a lot lately. It seemed like the perfect project to use up those flowers so carefully stamped and cut out, then abandoned in favour of monsters, back in this post. Luckily they were abandoned to a safe place, and not the rubbish, so this card came together very quickly. (Now I just need to find a project to use up all those carefully stamped, cut out, and abandoned shells, from, the other day!)


I'm not sure who first came up with this idea, but I got the directions from Stephanie Luman. The card is a smaller one, so I am thinking next time I may make it a little bigger. I also used some tape to help hold the pot closed, and the card in place, rather than just have the ribbon holding it all together.


As you can see, the pot is kind of like the envelope (although the whole thing does fit in an actual envelope, for posting if you want), and the flowers are attached to the inside card that pulls up and out.

The neat thing about this project is that it can be changed in so many ways - change the colours and flowers, throw in a butterfly, or other bugs, go for an all green pot plant, or other favourites such as cactus or bonsai.... It could also been a fun way to have some hidden journalling on a scrapbook page, don't you think?
............Edited to add..........
Flowers are stamped using the Eastern Blooms set, and I also stamped the bottom of the flower pot with choc chip ink, and the 'sanded' background stamp - although that is a bit hard to see on the photos. Colours are tempting turquoise, red riding hood, so saffron and choc chip, with a bit of (retired) wild wasabi for the leaves.

Saturday, May 16, 2009

Home alone...

... and loving it! Peter has taken the kids out for lunch and a movie, and I am having fun playing! Campbell thought it was a good idea that I stay home. They are going to see monsters versus aliens in 3D, and he was worried that I might freak out (it does have a GIANT lady in it Mum!)
Instead, I am working on a couple of little projects that got started but not finished the other day, and trying out a cute little card idea that has been doing the rounds of the blogs, and, pretty much, anything else I feel like!
Odds are good, that I will have stuff to share later on today...
have a good weekend everyone!

Wednesday, May 13, 2009

Wild about Animals

Argh! I have just spent the morning (well, part of the morning) cleaning the plastic toy animals from Campbell's school. Incidentally, I discovered in the process, baking soda is great for getting those annoying marks off the soft plastic toys. While I sat there, leaning over the bath, scrubbing, with my fingers getting pruney, I got to thinking about this layout...


It's an old favourite, that some of you will have seen before, but it fitted with the theme for the day, so I figured I would share it again anyway. We have a good supply of animals ourselves, thanks to Santa, and all the kids play with them a lot. They were an early favourite of Bridie.

Although she was pretty good at keeping the animals contained back then, this layout was supposed to show them all spilling out of the box. I wanted the stamped animals and the photo to kind of blend together. I stamped them out on white card and then cut them out - that was the trickiest part of the layout - then positioned them over the edge of the photo, and across the bottom of the layout, some of them upside down and topsy turvy.


I used the sentiment from the Stamp set as a title for this layout, and with the darker cardstock, this was the perfect opportunity to pull out that white gel pen for some quick journalling. I won't mention the colours used here, as they are long retired in colours. The stamp set though, is still available - the very versatile 'Wild About You'.

And now I have to do some emergency repairs on a beanie baby monkey - poor guy, it seems his arm is falling off (oh yep, we've been cleaning the beanie animals too - it's a regular zoo round here at the moment!)

Monday, May 11, 2009

gifts from my boys

So it seems over the last week or two, both my boys have been busy at school working on the most wonderful Mothers Day gifts ever. I just had to share them...
From Hayden, there was a card - complete with a pop up heart (I think I might have to try that some time!) and a fridge magnet he had made himself. Now that in itself is lovely, but what made it extra special?


That's our cat Jude. We are all missing her a lot! She is a pretty well travelled cat (7 or 8 plane trips, including international flights), but at 15 years old, travelling with us this time just wasn't an option. Instead she went to live with Nan and Pop, where, by all accounts, she is turning into a fat, fat cat. Clearly, she isn't missing us as much!

As for Campbell - he proudly presented me with this beautifully decorated box...

most definitely filled with treasure....


Isn't that just perfect?
Thank you boys, and a big thank you to the teachers as well.
With the end of school fast approaching (only two more weeks for Campbell!) we will be working on presents for the teachers over the next week or two. I will be sure to give you a peek at what we come up with - pretty sure it will involve cutting and sticking, and maybe even a stamp or two!

Thursday, May 7, 2009

one idea, and a couple of cards

So this is me just playing. I had been wanting to give that little chicken from Nursery Necessities an outing for a while, and it was a soft subtles kind of a day. Punches are welcome anytime! First up was this pink card. I looove that soft taffeta ribbon. It is so easy to work with.


Then I got to wondering, what if I used the scallop square for the mats instead? (forgetting for a minute that the scallop square wasn't that much bigger than the square punch). Too lazy to cut my own, slightly smaller white squares for the chickens, I decided to go all scallops instead, this time going for a celery card and ribbon.


I am really liking how, although they do look the same, they also look quite different. Amazing how a change of colour or shape can make a whole new project.


Wednesday, May 6, 2009

Perfect timing for a colour challenge!

  • Here I was thinking I needing to get on and make something!
  • I needed some Thank you cards so they were at the top of the list.
  • Bridie fell asleep on the way to collect the boys, (a quiet afternoon, but we will be regretting that tonight, big time!)
  • Kristina had a new colour challenge up.

Like I said - perfect timing!

So here was my effort. A simple little card using the very lovely Eastern Blooms stamp set.


I used markers to put the different colours straight on to the stamp. This is a great way to use multiple colours on a stamp, or to ink up just select portions of a stamp. Best of all, we can now buy the Stampin' Write Markers individually, so you just need to get your most favourite colours!


I inked up the different parts of the stamp using rose red, chocolate chip, and more mustard markers, then stamped off on some spare white card and set it aside for another day. I don't want to waste it after all! I then reinked select flowers, and stamped on my project. This meant that some flowers (the reinked ones) were darker than others, which had already been stamped off once.

A 'thank you' from the short and sweet stamp set, and some earth elements brads (mustard) and it was time for Bridie to wake up. And homework to be done. And dinner to prepare.....

Perfect timing really is short and sweet!

Stampin' Up! Convention

Last weekend the annual Stampin' Up! convention was held in Canberra. This convention was for SU demonstrators from Australia and New Zealand, and although I wasn't able to attend, quite a group of lovely ladies from my team were there. By all accounts a fine time was had by all - lots of great awards (congrats ladies), prizes, inspiration, fun and games - well maybe not games, not sure about that bit, but fun anyway.

I was very pleased to hear that I had received a sales award, as had my team mate Kelly Chase. Although we didn't get to go up on stage and receive the award from Shelli Gardner - SU head honcho (not being in Canberra made that a little tricky!) we have apparently had our five seconds of fame anyway - with our names up there on the big screen - yay! A big, BIG thank you to all my lovely friends (new and old) and family who have supported my SU ventures over the past couple of years. It is very much appreciated, and I have had a lot of fun along the way. I hope you have too!

One snippet of info that has come out of convention, which all of you may be interested in, is about our latest Idea book and catalogue. Having just launched on April 1 2009, this latest catalogue will be current until September next year, rather than March 31, like we all had assumed. The reasoning for this is to help bring all of the SU Markets (NZ/Aust, France/Germany/Great Britain, and US/Canada) more in line. If you are anything like me you will be now suffering from a case of 'What ?!' but the good news is, we will now be having three mini catalogues instead of two, to help get us through until September. Based on past mini catalogues, it is safe to say the minis will include new stamps, papers, accessories, and possibly new hostess goodies - as if we needed more stuff on our wish lists!
Now on a totally unrelated note - I have discovered over the past few days, that while some books can provide us will lots of inspiration, others can provide us with total distraction! I am blaming Peter for my total lack of creativity the past few days - he was the one who brought the books home from the library, so he can take the rap. The good news is I finished my book last night, so unless I sneak to the library again today, there is hope for something new coming soon...

Sunday, May 3, 2009

Promo #2 - $175 SU starter Kit!

If you have thought about becoming a Stampin' Up! Demonstrator in the past, now is a good time to think about it again. For the month of May, SU are offering a 'scrapbooking starter kit' for just $175 (valued over $220). A sample of a kit is shown below (of course you are welcome to exchange colours, and the stampset for another that you prefer) and includes:
  • Any stamp set valued up to $91.95 (schoolbook serif alphabet pictured)
  • A Simply Scrappin pack (petal party pictured)
  • A 12 x 12 Textured Card Stock Pack (bold brights pictured, but should have been earth elements I think!)
  • A classic Stampin' Pad (Pumpkin Pie pictured)
  • Craft and Rubber Scissors.

In addition you will receive all the business supplies you need to get your business up and running:

  • The Getting Started DVD and Guide, and a project sample sheet.
  • 100 x Guest Invitation Postcards
  • 8 x Idea Book And Catalogues
  • 10 x 'To my Hostess' envelopes
  • 20 x Hostess Brochures
  • 10 x hostess benefit forms
  • 50 x customer order forms
  • 20 x recruit brochures
  • This streamlined starter kit is particularly good for people who have already purchased SU product, and don't necessarily need everything the standard kit includes, or those who would like to build their supplies a little more slowly. Of course, throughout the month the standard kit will still be available for the usual price of $379 - click here to see what that includes.

    So, a couple of questions...

    What are the benefits of becoming a demonstrator?

    As a demonstrator you will enjoy many benefits, including discounted purchases for yourself, and the opportunity to earn free product. You also have the opportunity to turn this into a business if you want, and make money from SU. Then of course, there is the wonderful opportunity to meet others with similar interests, and a good excuse to get creating - this could be just the kick in the pants you need! One of the things I found was I nolonger felt guilty for spending time scrapping - it was my job after all!

    Do I have to take workshops and/or classes?

Only if you want to. I consider there to be three main types of demonstrator.

  1. Discount Demonstrators - those who join primarily for the discount, buying for themselves, and perhaps selling to a few friends and family.
  2. Hobby demonstrators (this is where I see myself) - doing occasional classes or workshops, but only when it fits in with life (!), and having my hobby pay for itself.
  3. and Business demonstrators - those people who see it as a part time/full time job, and who are creating hugely successful businesses (money in the bank).

    What support will I receive as a demonstrator?

    As a demonstrator you will receive access to the demonstrator part of the SU website (a great source of ideas and inspiration), as well as a monthly 'magazine' sent out by SU. You also will have the opportunity to attend optional training days put on by SU, and of course the annual convention (next year in Sydney?). You also become a member of a fantastically talented, and supportive team of demonstrators (many of whom have just recieved top honours at convention), having the opportunity to participate in team swaps, trainings, events, and an online forum, for advice, guidance (and just chatting!)

    What's the fine print?

    click here to see a copy of the demonstrator agreement.

More questions? Please contact me and I am happy to answer any questions you may have. I can definitely recommend becoming a demonstrator. I know I love SU product - and so do a LOT of other people! As an added bonus, because I love my punches so much, if you sign up as a demonstrator with me this month (either with this limited time $175 scrapbooking starter kit, or the standard $379 starter kit) I will throw in the punch of your choice from the current catalogue.

SO, let me know if you have questions, or are interested, please contact me - tracee.creates@gmail.com or traceeandpete@xtra.co.nz I look forward to welcoming you onto the team!

Making scallops with a Circle Punch

There are a lot of great scallop punches available - circle, square, and of course the scallop edge punch. Sometimes though, these won't do the job. The circle or square may not be the right size. Or perhaps you have a different shape - such as oval, that you want to add scallops too?

Cue your trusty circle punch. Size dependent on the project at hand - for this quick demonstration, I have used a 3/4 inch circle, and an oval of card, cut using a Coluzzle template.

All you need to do is punch out lots of circles, and then apply repositional (non-permanent!) adhesive to the back of your oval (or whatever it is you are 'scalloping'). You only need to put the adhesive around the outside edge of the shape - just enough to hold those circles in place. And then you get to work positioning the circles. This is where the repositional adhesive proves a winner. You can rearrange as much as you like until you are happy with the spacing. (As you can see some of the circles aren't perfect circles, and that is okay because that bit will be hidden anyway!)


This is what it looks like from the front. The scallops are actually even, top and bottom, but the photo was taken on an angle so they don't look it! I have the circles sticking out a long way - kind of petal like. You can stick them down just however you like, with one or more layers of circles/scallops.


The final step is to use a more permanent adhesive. You don't want all that carefully positioning to fall off on the floor! If you want you can do each circle, one at a time, sticking them to the oval, but I am not that patient. Instead, I applied the permanent adhesive to the back of the oval and all the circles, and stuck them on the front of the card. I figured that even though the circles and ovals are attached together 'temporarily', the fact that the circles and oval are attached to the card permanently, should mean that it will all stay intact. So far, so good!


Friday, May 1, 2009

Free Designer Patterned Papers - promo #1

Who doesn't love free patterned papers?

So, in a celebration of scrapbooking, Stampin' Up! have a couple of fantastic promotions for the month of May. First up, free papers. When you purchase three packs of selected Designer Series papers (19.95 + pp) you will get one more pack for free. There is no limit on how many free packs you can get - so if you bought six packs you would get two free....

The paper packs that are included in the promotion include a wide variety of colours and patterns...

  • 112042 Urban Garden Designer Series (see photo above)
  • 112470 Haiku Designer Series
  • 113976 Pink Flamingo Designer Series
  • 112468 Sweet Always Designer Series
  • 113992 Tea Party Designer Series
  • 113975 Raspberry Tart Designer Series
  • 113966 Good Morning Sunshine Designer Series
  • 112469 Holiday Treasures Designer Series
  • 112041 Bella Rose Designer Series
  • 113974 Bella Bleu Designer Series
  • 113978 Urban Oasis Designer Series
  • 112461 Washington Apple Designer Series
  • 112039 Windsor Knot Designer Series
  • 113980 Candy Lane Designer Series

All of these papers can be seen on pages 132 - 135 of the catalogue. If you don't have a catalogue you can view them online - see the link on the sidebar, or click here.

If you would like to take advantage of this promotion please contact me. The free papers are available until 31 May. Tracee.creates@gmail.com

Keep an eye out for another post coming soon - the second promotion for the month sees the cheapest ever offer of an SU starter kit - is it time for you to start your own business, doing what you love?