Pages

Showing posts with label retired list. Show all posts

Wednesday, August 25, 2010

New 25 -50% Discounts on retiring product!

Stampin' Up have just announced some additional discounts on selected items from the retiring/last chance list:

Item # Page    Description    Discount    Discounted NZ Price
116342    42    Big Bold Birthday 50% $    31.98
116408    100    Seeing Spots 50% $    17.98
116344    121    Big Deal Alphabet 50% $    45.98
116208    126    In Color card stock (A4) 50% $      8.63
105538    127    Bold Brights Stampin' Write markers 25% $    51.71
105537    127    Soft Subtles Stampin' Write markers 25% $    51.71
105540    127    Rich Regals Stampin' Write markers 25% $    51.71
105541    127    Many Marvelous Markers 25% $  209.96
 105550     128     Bold Brights Classic Stampin' Spots  25%  $    37.46
 105551     128     Earth Elements Classic Stampin' Spots  25%  $    37.46
 105539     128     Earth Elements Stampin' Write markers  25%  $    51.71
 105552     129     Rich Regals Classic Stampin' Spots  25%   $    37.46
112042    132    Urban Garden Designer Series paper 50% $      9.98
112041    134    Bella Rose Designer Series paper 50% $      9.98
107305    152    Oval Large punch 50% $    17.98
113692    152    Eyelet border punch 50% $    17.98
109043    152    Scallop Circle punch 50% $    17.98
113694    152    Heart to Heart punch 50% $    17.98
112082    152    Wide Oval punch 50% $    17.98
112091    152    Scallop Edge punch 50% $    17.98
113693    152    Full Heart punch 50% $    17.98
104310    155    Crafters' Tool Kit 25% $    68.96
112004    AW28* 1-3/4" Circle punch 50% $    17.98
116629    CO* Butterfly punch 50% $    17.98
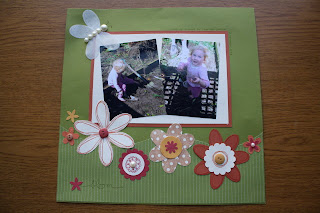
As with all product that is retiring these items will only be available until the end of August, or while stocks last.  To see the complete list of retiring product you can click here.  To see a list of product that is running low, or sold out already, you click here, or on the link at the top of my blog (right under the photo of Campbell and Bridie admiring their scrapbooks!)

Contact me ASAP if you would like to order any of this retiring product.  With discounts like this it is likely to go fast!

Friday, August 6, 2010

Baby Shower Butterflies

I am loving the single butterfly stamp from the mini catalogue, and when I needed a card and gift bag for a baby shower recently I decided that the butterfly would be perfect for a sweet baby girl and her mama, (who has two boys already and so not a lot of pink butterflies in her life!) 

I used the retiring Pink Pirouette patterned papers to make the gift bag, teamed with pink pirouette ribbon for the handles, and an assortment of pink inks for the butterflies on both the bag and the card.  

The sentiment is from the nursery necessities stamp set (also on the retiring list) because it had to have a hint of baby to it.  Alas the photos are worse than usual (an overcast morning on top of our cave like apartment don't make for happy photos) but hopefully you can see enough to get the gist of it!


Wednesday, August 4, 2010

A Clipboard for the Teacher

Recently we needed to come up with a gift for Campbell's teacher. Something that would be useful, and not too flowery and frilly.  A nice, useful, masculine gift for the teacher.  After a bit of thought we decided to decorate a clipboard, and this is what we came up with:

We decided to go with an owl theme -  decorating the back with one wise owl on a branch (chipboard from the So Tweet On Board Pack, covered with card, and papers from the Good Morning Sunshine DSP pack) and lots of eager little owls awaiting instruction covering both sides of the clipboard (another sheet of paper from the Good Morning Sunshine pack).  We personalised it using letters made with the Timeless Type Junior Alphabet dies from the Autumn/Winter mini catalogue, and then finished it off with some strips of coordinating card (pacific point, kiwi kiss) and some ribbon.  Several coats of modge podge help to seal and protect it all.

Campbell was really pleased with his gift, and the teacher was most appreciative. Best of all it was a relatively quick and easy project, and inexpensive too.  Perfect for mass production!

The kiwi kiss cardstock, Good Morning Sunshine DSP, On Board So Tweet, Kiwi Kiss ribbon, and Pacific Point Ribbon used in this project are all on the 'last chance list'.  Available only until 31 August, or while stocks last.

Last chance to get Retiring SU products...

The new Stampin' Up! Catalogue is just a few weeks away, so of course that means last chance to get those products that will be retiring.  The full list of retiring product can be seen online here.  I'm not going to list them all in this post because there are nine pages of retiring products this year - eek - remembering of course with the colour renovation we are saying goodbye to lots of colours (ink, card, embellishments) to make way for some lovely new colours.   
There are 95 stamp sets in the catalogue that are retiring, as well as 15 stampin' around wheels (8 standard size, and 7 jumbo) and all of the hostess sets.

You will see that the punches all appear on the retiring list.  This is because they are being 'reconfigured' into the new punch style we saw in the latest mini catalogue.  

There are five punches that will not be returning though, and these are:
  •  Small Star
  • Trio Flower
  • Double Rectangle
  • Horizontal Slot
  • Slit
You will also see that some products have been discounted (25-50%) and there are some great bargains.  Some of the highlights of the discounted retiring product:

Three punches - Boho Blossoms, Scallop square, and the scallop oval punch are all 25% off.
17 of the stamp sets are discounted by 25%, and these Six stamp sets are 50% off:
  • A Happy Heart (page 34) now $24.98
  • Best Wishes and More (page 53) now $28.48
  • Greetings Eight (page 57) now $29.48
  • Only Ovals (page 93) now $23.48
  • Enjoy Every Moment (page 97) now $31.48
  • All Scallops (page 105) now $33.48
Many of the markers in the retiring colours are discounted (usually $6.75, now $5.06, or even $3.38 for a couple of colours!) as are many of the stampin' around inked cartridges.

Four of the Simply Sent kits are reduced by 25%

Six of the patterned paper packs are 25% off, and Pink Flamingo has 50% discount (now only $9.98 for 12 sheets of paper)

The Simply Scrappin' kits are all retiring, and the I Wish" Simply Scrappin Kit (page 137) is discounted by 25% 

Lots of embellishments are being retired (ribbons, brads, buttons, chipboard, assorted flower embellishments, rub-ons and glitter) and there are some great bargains to be had here too.

Double-Stitched ribbons in Rose Red, Chocolate Chip and Bashful Blue (page 150) are 50% off - now only $11.75 Several of the other ribbons have 25% off.

The Chunky Sprinkles Glitter (page 145) is also discounted by 50%  (now $18.98 for four colours).

Both the 'Flower Fusion', and 'Flower Fusion Too' felt flower packs as well as the 'Blooms Again' cardstock diecut flowers (page 144) are discounted by 25%.

The 'Blooms' cardstock flower die cuts (also page 144), are 50% off.


Don't forget that all of these retiring products will only be available until 31 August, or while stocks last.  I will try to keep a list up to date of what is running low/sold out already! You can find it by clicking the 'What's gone already?' tab at the top of my blog (right under the photo of Campbell and Bridie looking at the scrapbook).

A reminder also that the Autumn/Winter Mini catalogue will also be ending on 31 August.

Let me know if there is something that you want to order.

Sunday, March 29, 2009

LAST CHANCE!!

Tuesday 31 March is the last day to order product that is on the retiring list. Many of these products have been discounted - mostly 25%, but a couple of the papers have 50% off. To see the complete list of retiring products please use the link on my sidebar. There are a number of products that have already sold out - and I have a list of these over there to the right (and down a bit) ......>

Tuesday is also the last day to order products from the Summer Mini Catalogue. I can tell you that some stamp sets are returning to the new catalogue, as well as both of the punches. Not returning - all of the papers, the rub ons, and the stamp sets and wheels listed below:

Live Your Dream
Friendly Flowers
Lots of Dots (wheel)
Time For You
Perfect Fit (wheel)
Big on Spring
In the Stars
Love Owl-ways
For Father

If any of these sets were on your wishlist, you have until tomorrow to order them. Please contact me ASAP (before 6pm NZ time) to place your orders.

And of course, if you would like to preorder your copy of the new idea book and catalogue for just $10, let me know also - THEY HAVE ARRIVED - and are waiting to be posted out to you! I will have a link to the new catalogue up on my blog as soon as it becomes available (probably from 2pm Weds, but possibly sooner). Look for it right over there .....> where all the retired list stuff is (I will pleased when that retired list stuff is gone from there!)
Happy stamping everyone!

Sweet Baby Boy layout

So I've updated the photo, and here it is. It's a little bit better. My sweet baby boy, in a photo with me - unheard of!


This layout was inspired by an Ali Edwards layout. Although I had to change it quite a bit. I couldn't find my white 12 x 12 card, so went with blue instead, and my chipboard frames were circles and squares instead of hearts (and yes, I probably could have made my own, but when I started this layout I thought it was going to be a quick one - no time for that!) It probably would have helped if I had have had a photo in mind, before I started painting and stamping, but there you go, sometimes you just have to dive on in.

So after the initial diving in, I got a bit stuck - not such a quick project after all! This is also a little removed from my usual straight lines and simple. Not only did I not use a ruler once, I didn't even use my paper trimmer. Find a straight edge if you can!

The initial idea was more of the 'make your own patterned background' theme. This time I started by roughly painting the bashful blue card with acrylic paint (white with a hint of blue), leaving the blue card visable round the edge like a border.

Over the top of this, to add some interest, I used the super handy 'lots of dots' jumbo wheel, from the summer mini catalogue. I am loving this wheel (even though it is probably kind of boring!) and am really disappointed to find out it hasn't returned in the new catalogue. Apologies in advance - you will probably see this one used again in the future - retired resmired I say!

I inked the wheel up using my bashful blue inkpad (and then a little bit of not quite navy, applied to the wheel with a sponge) rather than a cartridge. Once the wheel has been around once the image will start to fade BUT - I knew the middle would be covered over so could work it so that was where the faded bit was. Also, because I was going for a 'quick and easy thrown together' project, I kind of figured it didn't matter if some dots were lighter than others - it just adds to the interest. I went over it a few times anyway - sorry it doesn't show up so well in the layout photo, but you should get the idea from the closeups.


I also painted over the chipboard frame, and then sponged bashful blue, and not quite navy ink around the edges of the chipboard, and roughly over the rest of the frame.

The rest was made up of bits and pieces. Some yummy wide bashful blue stitched grosgrain from the mini, flowers from the pretties, dyed with night of navy ink (see this post to find out how to do this), some hand cut vellum hearts - with piercing round the edges, and some stamped up images from assorted stamp sets - mostly retiring - but not at my house!


I also managed to throw in a petal from the pick a petal set - see it up there? I didn't ink the smile word on the stamp - instead I left a gap and wrote my own word in, then used the inside of the petal to write the date.

I must confess, I am not entirely convinced that this is quite finished. But I guess that is what happens when you try something new. What I did enjoy was all the playing, experimenting, and DIY. And that another empty sleeve in the album is empty no more!!

Ingredients for this one (ones in bold are retiring tomorrow - several are discounted!):

Bashful Blue., whisper white, and night of navy card, vellum
bashful blue and night of navy ink
On Board Ginormous Pieces chipboard frame
flowers from Pretties kit
Bashful Blue double stitched grosgrain ribbon
Lots of Dots jumbo stampin around wheel (and handle)
ABC Alphabet Lower
Stamp of Authenticity
Office Accoutrements
Pick a Petal
Everyday Flexible Phrases
Expressive Flexible Phrases


Tuesday, March 24, 2009

Some important dates

Okay ladies, so this post is all about SU stuff, a couple of important dates to be exact.

Tuesday March 31st

This is a day of 'lasts'.

It is the last day on which you can order product from the current catalogue - including all those super specials on the retiring list (see the link on the sidebar). Please contact me ASAP if there is something you would like to order.

It is the last day that you can order from the Summer Mini Catalogue (see the link on the side bar to view the catalogue online). I understand there are a couple of the stamp sets that have made it to the new catalogue, as well as the scalloped edge punch, but the rest are going, going, gone!

This is also the final day of the Victorian Bushfire Appeal promotion. When you purchase one of the stamp sets below SU will donate 50% to the appeal, and I will cover the cost of postage (you just pay the usual price for the stamps).

Priceless 112312 p105 $57.95
Seeing Spots 108909 p89 $35.95
Baroque Motifs 112380 p98 $46.95
Live Your Dream 114261 p3 (Summer Mini) $66.95
Looks Like Spring 108864 p76 $68.95
The Snowflake Spot 108934 p27 $46.95
Bodacious Bouquet 108756 p80 $68.95
Polka Dots & Paisley 110247 p46 $42.95
G'day Mate 111973 p115 $42.95
Be Happy 108744 p51 $46.95


Wednesday April 1

Not just a day for Fool's, this is the day that our new Catalogue is launched. Although I haven't seen it myself yet, boo hoo, I know for a fact that it has arrived, and is looking lovely. If you would like to get a copy for yourself please contact me - Until April 1 you can pre-order them for $10. After that they will of course still be available, but at the SU price of $14.95

If you have already contacted me to request your copy, or are a member of my stamp club, placing an order in April, you will automatically have your copy sent out to you over the next week or so. Definitely in time for April 1.

And a final note on the topic of new catalogues.

On Friday evening I finally got my hands on a copy of the US stampin' up catalogue - it is keeping me going until I get my hands on the new NZ/Australia one. Lots of great ideas, and yummy stuff that I am hoping we will get too. And then I turned the page and saw this....


(excuse that camera flash in the bottom left corner)

Hey! that was my idea!!

Must have been a good one if they thought of it too!

So who has been saving their tin cans?!

Monday, March 16, 2009

DIY Patterned Papers

Something I have been experimenting with for a while is making my own 'patterned papers' and backgrounds, using card, ink and stamps. It doesn't help with using up my stash at all, but there is something very satisfying about looking at a layout that is totally your own. Some of you got a chance to try this out yourselves when you attended an extravaganza with me. So I am wondering - have you tried it again?
Here is an example for you, using one of my favourite two step stamping sets - Petal Prints - I was sad to see this one on the retiring list. It wasn't until my Mum got this set, and I borrowed it (and struggled to give it back!), that I discovered how much I loved it. For a while there, Mum got to see lots of projects made with Petal Prints.

'What set is that?' she would ask. 'I might have to get that'.

'Mmm, same' would be my ever so whispery reply.


(You may be pleased to know that I finally bought another set and now we both have one!)

But back to this layout. The DIY patterned paper bit is the flowery piece behind the photo (okay, so that was a bit obvious, and you probably figured that out already, but just in case you hadn't - it is another bad photo afterall!). It was super simple to do.
Recipe for this one:
Bashful Blue, Night of Navy and Whisper white card
bashful blue, night of navy and mellow moss ink
Stamps: Petal Prints, Office Accoutrements (both retiring) and Life Definitions
Flowers from Pretties kit, rhinestone brad ('ice')
I first stamped with the background part of the daisy flower using bashful blue ink, in a random pattern around the edge of the card. Some of the flowers are stamped off the edge of the card because it just looks better with some hanging over the edge. (I didn't stamp the middle of the card on the layout because I knew that it would be covered over by the photo, but this is a sample scrap for blogging purposes :)

Next I used the daisy outline stamp, and Night of Navy ink, and went over all those backgrounds adding an outline. One of the things I love about this two step set is that you don't have to line them up perfectly. You can if you want, but if like me, you have created your own 'higgledy piggledy' style, then this set is great! For some of the outlines I didn't reink, so the navy is a little lighter, and adds to the pattern (plus more of that quick, higgledy piggledy thing!).

To fill in any gaps I used the leaf stamps and Moss ink, and ... filled in any gaps. I just inked up one leaf at a time, rather than all three. There may still be some overlap, and that was okay by me. Once again, making sure to have some stamped over the edge of the card.

And that's it. Sounds like lots of time consuming steps, but is actually pretty quick, and best of all, you just change the colours/stamps to suit!
When it came time to put the page together I added some bashful blue daisy outlines to the bottom of the bashful blue base card to help to anchor it all. It doesn't show up so well in the photo, so you still get that 'floating in the middle of the page' look, but in real life, it makes all the difference - trust me! See them there - behind the date stamp? Tone on tone stamping is super subtle.

And for the journaling and finishing touches? The handy date and memo stamps from the Office Accoutrement stamp set, and 'happy' from the Life Definitions set. What I love about that memo stamp, is that if you don't want the word memo, you just don't ink it. The perfect journallng spot every time!

Add a couple of flowers and a rhinestone brad, and it's all done. If I get myself organised, next post I will show you how I coloured that flower to match the layout. That will be my challenge.
Your challenge? Pull some of those stamps out and have a go at making your own patterned papers and backgrounds. Go on, I dare you!

Friday, March 13, 2009

Cheap and pretty pen storage!

Okay. So I am sure I am not the only one who gets in a bit of a mess when they create?! Pens and pencils especially, have a tendancy to get swallowed up. I didn't want to spend a whole lot on storage so I decided to make my own.


Cue the spaghetti/tomato/soup tins...


The key to preparing the tins is a 'safety can opener' - the kind we used for those pop up cans (if you don't know what I am talking about here, don't worry. I will make it my mission to do a pop up can in the not so distant future!) Instead of cutting the tin, the safety opener somehow gets in between the seal, so there are no sharp edges. I have found that the pull top cans can still be a little sharp, so to reuse the can, I take the rim bit off with my trusty safety can opener too.


Eat the contents. Wash out the can, and then I pop it in the oven for a couple of minutes to make sure it is all dry (they tend to rust REALLY quickly if left too long to dry).


And then on to the fun bit - the decorating. Being short on time, these ones were super simple, but I like how they have turned out. I used patterned paper from the Petals and Paisley pack, and attached it to the outside of the cans using sticky strip (1 sheet of paper did all three cans, with leftovers). Because the cans were all different on the inside, I also lined them with a rolled up piece of Taken with Teal card, to match the paper. A little bit of sticky strip to hold the cans together, and then some wide Olive ribbon tied around to make them all pretty.


I wanted to lay them on the side (remember pens should be stored horizontally!) so that is why I used three cans in a pyramid shape - you could use as many as you like - but remember, one on its side will roll away, and that would not be helpful! You might also want to measure what you are going to store in the tins first. These tins are maybe a little short for the stampin' write markers - I discovered that a little late. But never fear, there is a big old soup tin sitting on the bench waiting for some friends, and patterned paper is on a super duper special!


Now I just need to get the pens to put themselves away!


The price of SU's patterned paper

As some of you know, this year the patterned papers were supposed to be $19.95 for a pack of 12 sheets. Lucky for us (unlucky for SU!) there was a misprint in the catalogue, and we have happily been paying $13.95 instead.
Of course, it was to be expected that they would not make that mistake again, and prices would increase to $19.95. I was surprised then to see in a 'sneak peak' of the new catalogue, patterned paper would be $22.95..... WHAT?!
Luckily I wasn't alone. Lots of demonstrators have offered their 'constructive criticism' on this, and SU have listened. They have just announced that the papers will now be $19.95. I am guessing that won't be the price listed in the catalogue, but I don't mind a bit of crossing out and rewriting in my copy!
That said, it is still not the bargain of this year, especially at the moment. All of the current papers are being retired, and there are only three packs that have not been discounted - (see the list below). These prices are for packs of 12 sheets of double sided paper, so at those prices you don't have to save them up for 'special projects'! They are also all still in good supply (except the Pumpkin Pie patterned Prints which is listing as low). Let me know ASAP if you would like to order some. If you don't have a catalogue you can see them online - click on the link on the sidebar to the right to go right to it.
$6.98 packs
Spring Flowers, Spring Showers (see 07-08 catalogue for a picture)
$10.46 packs
Berry Bliss, Brilliant Blue Prints, Brocade Backgrounds, Certainly Celery Prints, Close to Cocoa Prints, Dashing, East Coast Prep, Fall Flowers, Le Jardin, Notebook, Old Olive Prints, Outlaw, Petals and Paisley, Pumpkin Pie Prints, Spring Break, Spring Fling, Spring Silhouettes
$13.95 packs
Jersey Shore, Rose Red Prints, Wintergreen.
and of course, the papers from the Summer Mini - Bali Breeze, Ginger Blossom, and Afternoon Tea.
I should have had a photo of a project to show you, but with daylight savings having started, the morning light in here is darker than ever. Perhaps later today... (or tomorrow!)

Friday, March 6, 2009

Using those scraps (and not many words!)

So as I mentioned in that last post, I do have a wee collection of scraps. You just never know when you might need that itty bitty piece of ribbon/paper/card etc! Sometimes I do use them too, and here is an example.
Step One.
Gather together a collection of patterned paper scraps, and a coordinating piece of cardstock to stick them all on to. These ones all happened to be from the same pack of papers (a now retired one - SU's 'enchante' - you can get the same patterns, just different colours, while stocks last - 'le jardin'). Being from the same pack they all coordinated nicely for me - one less thing to think about!

Step Two.
To make them look a little less like a collection of scraps arranged on some card, I sponged the edges of all the paper pieces with perfect plum, or celery ink - depending on the paper, to give them a softer look. This is a really simple but effective technique that can add the finishing touch that is often needed. Just a matter of patting a piece of sponge (I cut mine into 6) onto the inkpad, and then rubbing it across the edge of the paper. Repeat as needed. Done!

Step Three.

Covering up all that work! Well not quite. Now you arrange your photos as desired, leaving space for embellishments and peeks at the patterned paper. This is a great way to scrapbook a lot of photos on one layout. This particular layout - about the friendship my children share (most of the time!) also allowed me to scrapbook seemingly unrelated photos from different days and adventures.

Step Four.
The finishing touches. I just used some stamped flowers that I cut out, small ones in groups of three, and a couple of larger ones, and then a couple of 'wordy stamps' as a focus - one of last years sale-a-bration sets, and the very versatile 'carte postale' set that many of you have. I love it when the sentiment on the stamp sums up what I am thinking. Great for when you don't have the room, or the inclination, to add journaling to your layouts.

journaling done!

Wednesday, March 4, 2009

Words, Words, Words

We all know that a picture paints a thousand words, but not all projects have to have pictures. Sometimes all that is needed is a good word, or two.


About 18 months ago (eek - that long already?!) I participated in a circle journal. For those of you who don't know what that is - a brief explanation of what is involved. A group of ladies each started a small scrapbook, choosing a theme, and any 'rules' they wanted (eg bright colours - you know who you are!) We had two weeks to complete a layout, and send it on to the next person on the list. We would then receive the next scrapbook, and the process would repeat. And repeat. Until at the end we had back our own, now complete, scrapbooks. It was a lot of fun, and a great way to challenge yourself to scrapbook topics and use materials that you might not normally.

And so now to todays blog. The theme for this scrapbook was words. Choose one word, and scrapbook about it. My word was learn. This layout took a little bit of figuring out. I was used to having photos as a focal point. There were a few false starts. But then my lovely word stamps came to the rescue. And the beloved rough edges alphabet. Love that set!

And here is where I ended up. (Please ignore the alphabet used for the word 'learn'. It is a retired set that I momentarily forget the name of. Terrible, I know, but there you go, that is why my word was learn, and not remember!) Patterned papers are also a mystery -non SU, using up bits and pieces from my stash. That rusty strip down the side of each page looks a bit like ribbon but is actually a scrap of paper (I don't throw anything out!)


I can tell you that the ink colour is Really Rust - one of my favourites. And the stamps - the soon to be gone rough edges alphabet, expressive flexible phrases (25% discount on both of these while stocks last) and the cool circle stamp is from the Polka Dots and Petals set, also retiring now.

So there you go. you don't have to have photos. If you are a scrapbooker, why not try this out sometime? Go on, it's a challenge!

Pick a Petal

This set, I am pleased to say, is not on the SU retiring list! It is a set that I was slow to discover, but am now loving the versatility of. For stamp club this month we will be making a birthday card with this set - with not a flower to be seen. I would even go so far as to say, depending on colour choices, it could be perfect for a masculine card - the hardest ones to make!


This layout was my first play with the set. The truth is, when I did the layout, I didn't even know what I would use it for, otherwise the colours may have matched Bridie's grubby pink outfit a little better (and yes, still working on the photos!) I did know that I wanted to try out some different flowers, and of course, make a 'bug'. The rest kind of evolved (are you sensing a theme with my creativity?)

Recipe for this layout:
  • Pick a Petal Stamp set
  • Bloomin' with Beauty Stamp set (spring mini - soon to be returning perhaps?!)
  • Cardstock - old olive, really rust, very vanilla, more mustard, ruby red
  • Ink - old olive, really rust, creamy caramel, ruby red, whisper white
  • Old Olive Prints Designer Series Paper (currently on the retiring list)
  • Vellum
  • Pretties Kit (half pearls)
  • Buttons (Earth Elements, Earth Elements and Neutrals - both retiring)
  • Scallop Circle punch
  • Spring Flower Bouquet punch (retiring)


To make the bug I used whisper white craft ink and stamped on vellum for the wings. You could also emboss this, but I was feeling lazy. A heat gun will help to dry the ink more quickly, and prevent smudging when you cut them out. (I got the heat gun out to dry the ink, but didn't emboss...!) The body and head of the bug are made with half pearl beads from the pretties kit. The antennae were first pierced, then I went over them with an olive marker to help them show up a little better. Looking at it as soon as it was done, the antennae should have been longer, but this was my first pick a petal bug, so that is how it ended up. Learn from my mistake! And please note, I cannot take total credit for this wee creature - there were several versions flying around on the internet last year, and that was the inspiration for this one.

The flowers, of course, were the easy bit. Choose a petal, choose a middle, add a button here, and a punched flower there - arranging them always seems to be the tricky bit. The old olive patterned paper was a great way to add a little interest (and perhaps a hint of stems?) behind the flowers, without taking attention away. I have really enjoyed the subtle patterns of these single coloured papers. I think we will be getting them again in the new in colours, but not sure about those old favourites such as olive and celery.

(Stamp club ladies - this was the layout that inspired last months card - can you see it?)

Spring Special!

The 'Spring Flowers' and 'Spring Showers' Designer patterned paper packs from SU have both been keeping a low profile for the past year. Although they have been available to purchase, they were missed from the catalogue, so of course, people didn't always know about them.

Both sets have the same designs, but the colours are slightly different. 'Flowers' has coral and moss in the mix, while 'showers' has bashful blue and caramel. Although both sets do contain some floral papers, they also include pages with more 'neutral' patterns, so can be used for both feminine and masculine projects. (I have a pdf file with the swatches for both sets. Email me if you would like me to send it to you). They also coordinate perfectly with the 'Looks like Spring' stamp set and the 'Spring Flower Bouquet' three flower punch. And they are retiring this month!

So here are some samples for you, two of my favourite scrapbook layouts. These will be familiar to many of you - they have done the rounds on my display boards!

Firstly though, a little side note about the photos. The lighting in our apartment is terrible. I am still trying to figure out just how best to photograph projects here, so please excuse the less than great photos! (and remember, if you click on the photos they will enlarge, which may make it easier to see the details!)

For this layout I cut around the outline of the flowers from the patterned paper. It took AGES, but I was really pleased with the finished look.
Ingredients for 'Safe' Layout (All SU!):
  • Spring Flowers Designer papers (using three of the patterns from the pack)
  • Mellow Moss and Very Vanilla Card
  • Mellow Moss Ink
  • Big Deal Aphabet stamps
  • Rough Edges Alphabet stamps (retiring this month - get in quick!)
  • A-Z accents stamps (for the little tag - retired last year - sorry!)
  • Black Stampin' Write Journaller, Hemp Twine, Stampin' Dimensionals, sponges
Ingredients for 'Plotting Mischief' layout (All SU!):
  • Spring Showers Designer papers (using three of the patterns from the pack)
  • Creamy Caramel and Very Vanilla cardstock
  • Creamy Caramel and Bashful Blue Ink
  • Looks Like Spring stamps (retiring this month)
  • It's a Date stamps (retiring this month)
  • Warm Words
  • Day to Day flexible Phrases stamps (retired already)
  • Newsprint Alphabet stamps (retired already)
  • Round Tab Punch
  • Spring Bouquet Flower Punch (retiring this month)
For this second layout I decided not to cut the flowers out! Instead I used the stamp set 'Looks like Spring'. The large flowers are stamped and cut by hand. The smaller flowers are stamped and then punched using the Spring Bouquet punch. The three different flowers line up oerfectly with the three different flowers on the stamp, making it a quick, easy, and best of all, unique embellishment for your projects.

As mentioned, all these lovely spring products (papers, stamps and punch) are retiring this month. The good news is they are on special!


Both paper packs have 50% off - now $6.98 +pp (and just think, in the catalogue last year they were $19.95, so it jst gets better and better!)

The Punch has 25% off - now $26.95 +pp

and the Looks Like Spring stamp set is part of SU's Red Cross Bushfire Appeal. No discount to you, but 50% will be donated to the appeal to support those people affected by the recent Victorian Bushfires. I will cover the postage on all bushfire sets. Contact me for more info!


Of course, being on the retired list these products will not be available after March 31, or sooner, if they sell out - no backorders available. Get in quick if you are keen!


Happy Stamping!

Tuesday, March 3, 2009

going going gone!

Okay, so if you thought I was kidding when I said you had to be quick, think again. Sorry to say that 'ahoy Matey' - the great set featured below - is now officially sold out. I have just updated the list to the right - lots more items now with reduced stock levels. Please check it before you send me your order - and I think the secret is not to wait. Things are selling out even faster than they did last year!

More inspiration coming tomorrow - think spring!

Hayden's Ahoy Matey Birthday Card

This set is a favourite of Hayden and Campbell's - both to receive projects, and make their own.
When it came time to make a birthday card for Hayden it was an obvious choice. To make it a little different from previous 'pirate' cards I decided to make it a spinner card (when you move the card from side to side that little pirate bird spins and slides along the 'ahoy matey' track).


And who wouldn't want a pirate chest overflowing with treasure? To make this I stamped with chocolate chip ink on Close to cocoa card. Then I cut the lid off the chest, sponged both pieces with cocoa ink to give them a grubby pirate look, and then attached both pieces to the front of the card, with the lid on an angle to look like it was opening.
For the treasure I used a mixture of silver and rhinestone brads. For added sparkle (you will have to take my word for that as it doesn't show up so well in the photo) I used a two way glue pen to get in between the brads, and then sprinkled on the dazzling diamonds. Might have been easier to put the glitter on before the brads, but it was one of those projects that evolved as it went along - I didn't know I was going to use the glitter until after the brads were on!
And of course for the base of the card, those lovely in colours - soft sky and blue bayou - My favourite colour combination at the moment I think. Stamping with soft sky ink onto the soft sky card (or any other same colour ink/card combo) gives nice subtle interest, without overwhelming the project.
If you want to replicate anything you see here, this is what you will need:
Ahoy Matey Stamp set (retiring this month - get in quick!)
Card: soft sky, blue bayou, whisper white, close to cocoa
Ink: Chocolate chip, soft sky, blue bayou
Stampin' Write Markers: (to colour the bird) bashful blue, barely banana
Punches: word window, 1 1/4 inch circle, 1 3/8 inch circle
'Sparkly Bits': Rhinestone brads (ice), silver brads (vintage), dazzling diamonds glitter
two way glue pen, stampin' dimensionals
And if you would like to know how to make a spinner card, contact me. I am pretty sure I have some instructions all written out already!

Welcome to my crafty blog!

Thanks for visiting!

As you can see this is very much a work in progress - a baby still. I am learning as I go, so please hang in there! I had planned to have it all pretty looking, and full of inspiration before I ever dared tell anyone about it. However, at the rate that the Stampin' Up! retired items are selling out, I may not have anything current to show you soon! So, in rather hasty fashion, here it is.

Now at this point I should have a little disclaimer. Although I am a Stampin' Up! Demonstrator, and I love SU product, I cannot guarantee that everything I show you will be exclusively SU! As I am sure you all understand - I have a 'stash' to use up! This blog is as much about proving to friends and family that I sometimes do finish stuff, as it is about sharing the latest SU promo.

That said, SU! have just released their list of retiring products. These are products that will not feature in the new catalogue (due out April 1 2009), and will not be available to buy from SU!
after the end of this month (or before, if sold out). Not ever again. For the first time SU! are also offering discounts off selected retiring items, so it is a good time to check your wishlist. To see the full list of retiring products click on the link on the sidebar to the right. I will also keep a list of items that have already sold out, or have low stock levels, over on that side bar.

SO... over the next few weeks I will attempt to share projects with you that highlight one or more of these retiring products. Many of these will be old favourite projects that many of you will have seen before. I promise I will work on some new stuff to share too. The housework may slip, but that is a sacrifice I am prepared to make!

If you like what you see, and would like to order SU! product (and you live in NZ) please feel free to contact me and I will get that sorted for you.

See you soon!